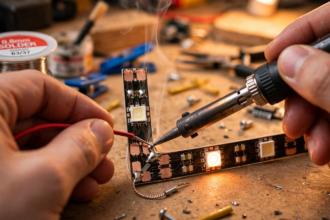



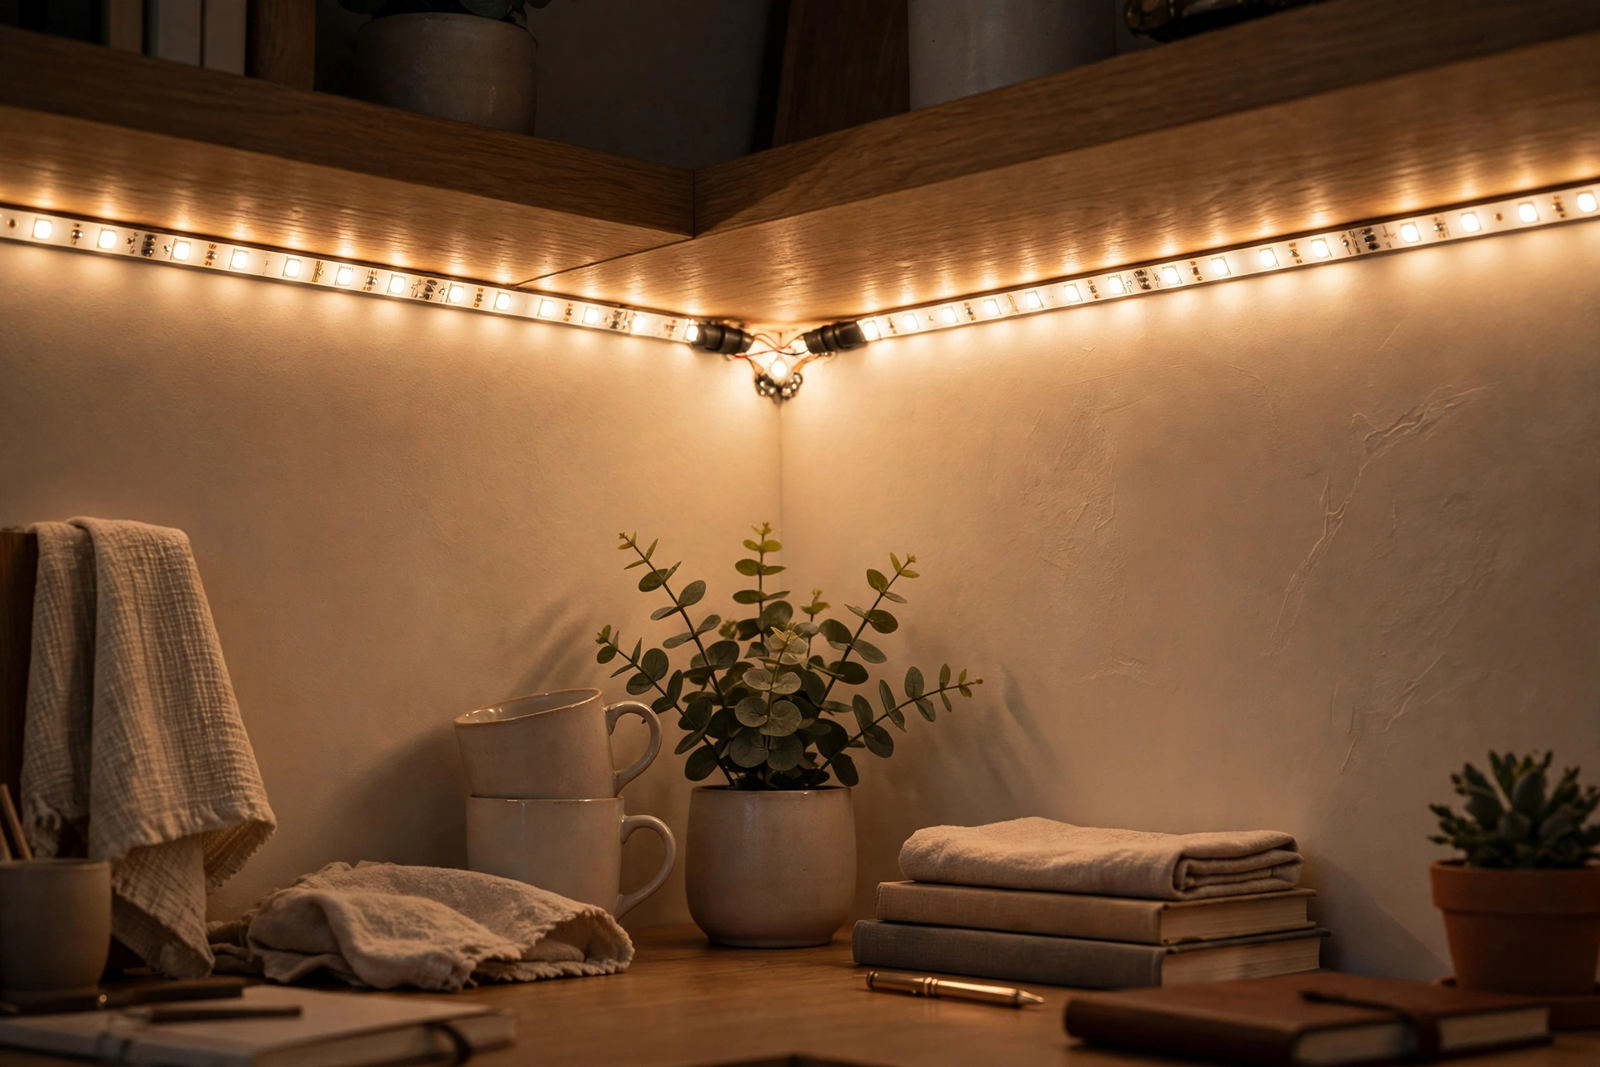
Learning how to solder LED strip corners without connectors is easier than you think. Cut the strip at the marked copper pads, tin the pads, then bridge the corner with short wire jumpers soldered pad to pad. Ten minutes per corner gets you a joint slimmer and more reliable than any clip.
- How to Solder LED Strip Corners Without Connectors: What You Need
- Soldering LED Strip Corners: Step by Step
- Step 1: Plan the Corner and Mark Your Cuts
- Step 2: Cut the Strip Cleanly
- Step 3: Tin the Copper Pads
- Step 4: Prepare Your Wire Jumpers
- Step 5: Solder the Wires to the First Strip
- Step 6: Bend the Wires Into the Corner and Solder the Second Strip
- Step 7: Insulate and Test
- Common Mistakes That Ruin Soldered Corners
- Soldered Corners vs. Clip-On Connectors
- What About Folding the Strip Instead?
- Tips for Waterproof LED Strips
- When Soldering Is Worth It vs. When Connectors Are Fine
- FAQs
- Can I solder LED strips without flux?
- What temperature should my soldering iron be?
- Can I solder RGBW or RGBIC strips the same way?
- My solder won’t stick to the pads. What’s wrong?
- How do I know which pad is positive?
- Can I solder the corner without cutting the strip?
- Is it safe to solder LED strips while they’re powered?
- Conclusion
Clip-on corner connectors look easy, but anyone who has used them for a while knows the truth. They loosen. They flicker. One bump and half your strip goes dark. On the other hand, soldering the corner directly gives you a permanent joint that survives heat, movement, and time. If you already own a soldering iron, there is no reason to buy connectors.
How to Solder LED Strip Corners Without Connectors: What You Need
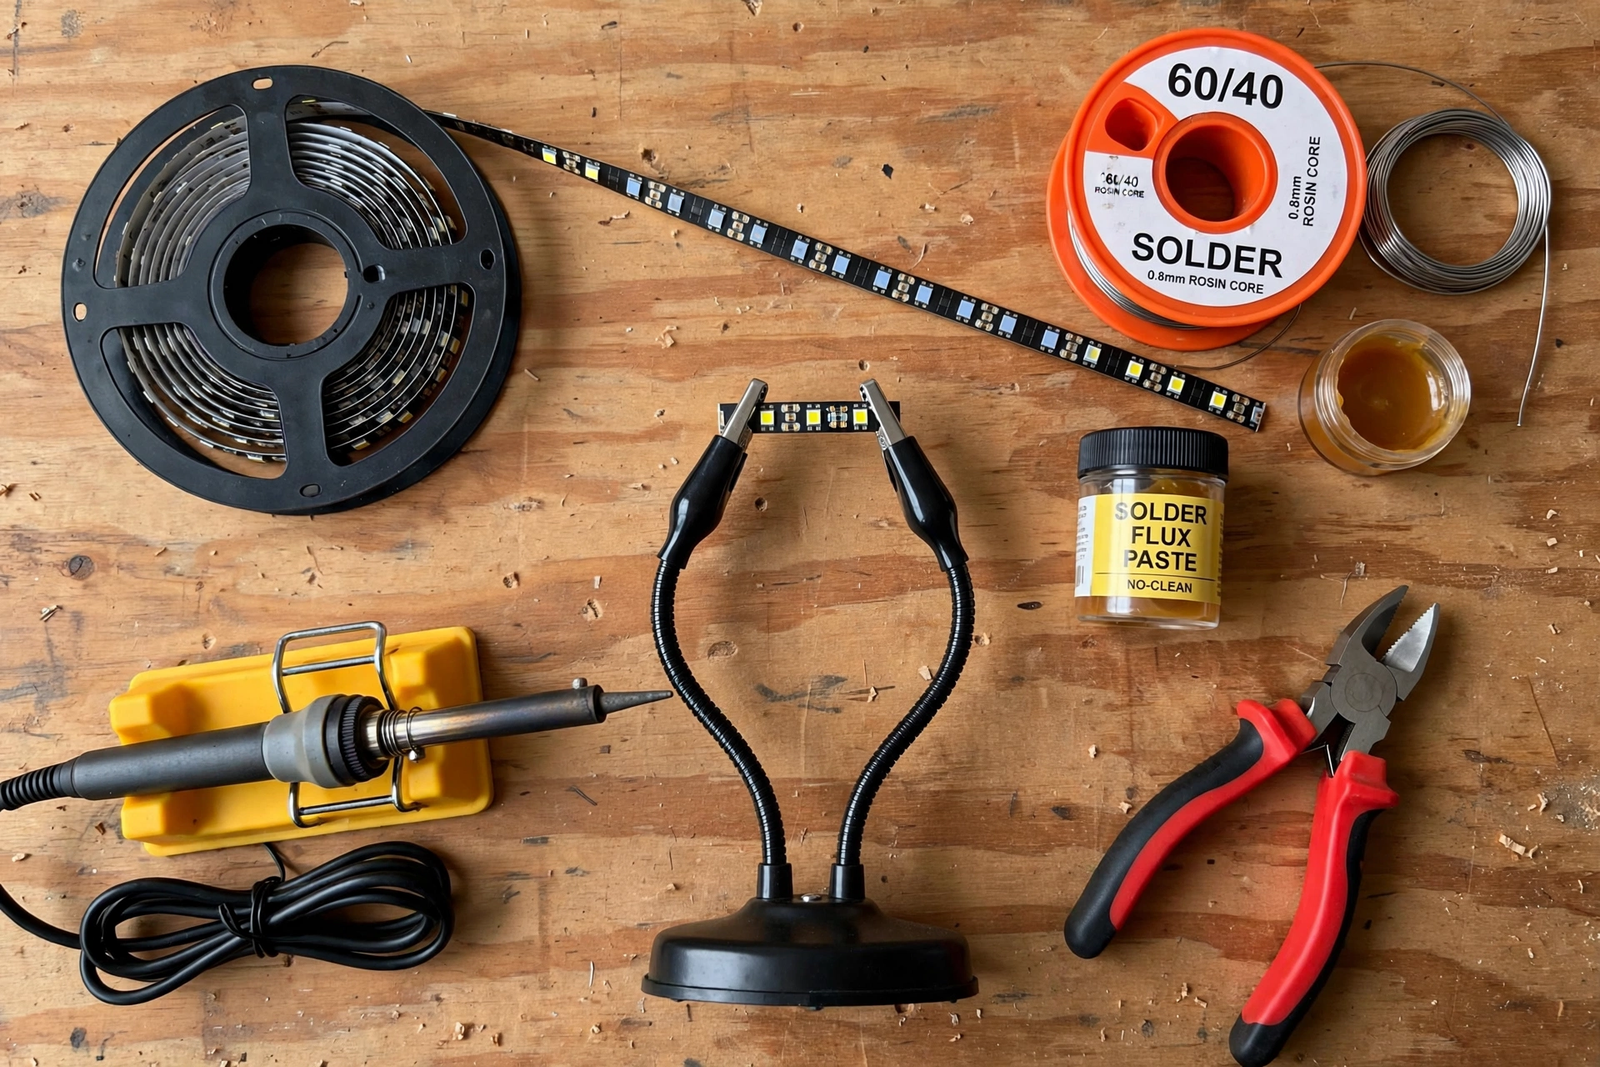
You don’t need much. A basic soldering iron with a fine tip, some rosin-core solder, and a pair of flush cutters will cover most jobs. A pair of helping hands or even a bit of tape to hold the strip still makes the work ten times easier.
Here’s the full list:
- Soldering iron with a fine or chisel tip (25 to 40 watts is plenty)
- Rosin-core solder, 0.8mm or thinner
- Flush cutters or sharp scissors
- Short pieces of stranded wire (22 AWG works well)
- Heat shrink tubing or electrical tape
- Isopropyl alcohol and a cotton swab for cleaning pads
- Something to hold the strip steady: helping hands, tape, or a spare pair of hands
One thing worth buying if you don’t have it: flux. A tiny dab of flux on each copper pad before soldering makes the solder flow like water. Without it, you’ll fight cold joints all afternoon. If you’re new to soldering in general, this guide to cutting and reconnecting LED strips safely covers the basics well.
Soldering LED Strip Corners: Step by Step
Step 1: Plan the Corner and Mark Your Cuts
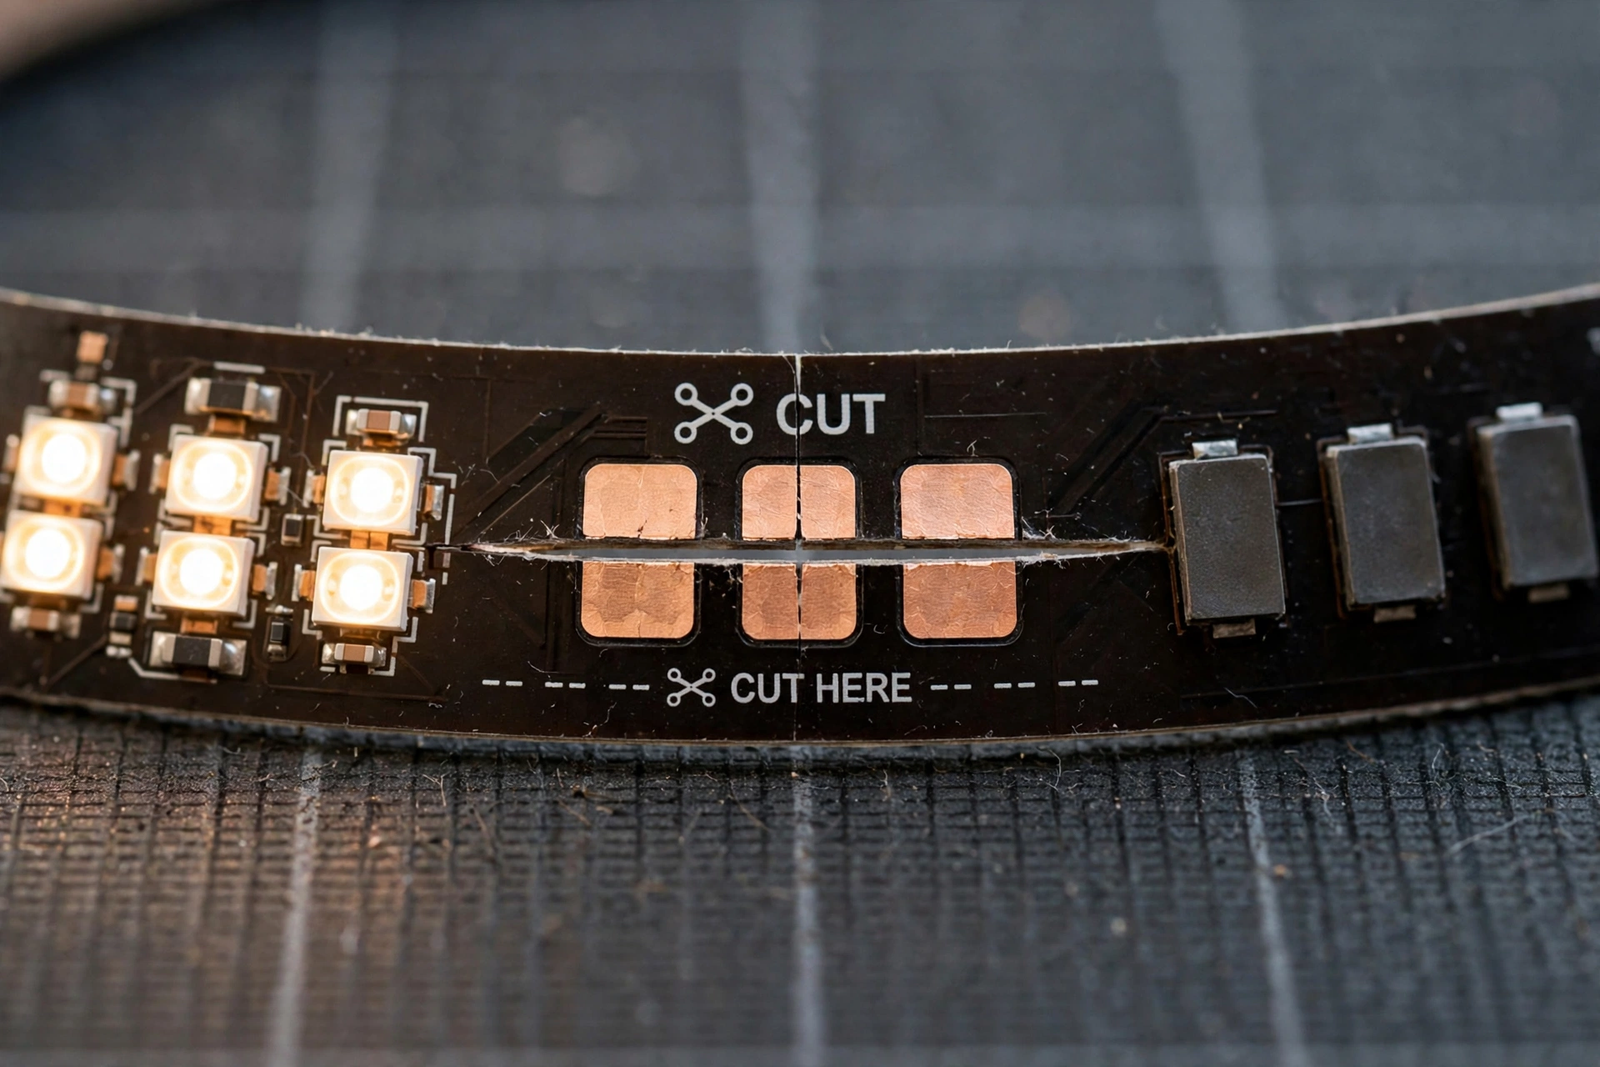
First, decide exactly where the strip needs to turn. LED strips can only be cut at the marked cut lines, usually every 3 LEDs, marked with a scissor icon and exposed copper pads. Find the cut line closest to your corner point and mark it.
Instead, don’t cut right at the corner. Leave yourself a little working room. You’ll cut the strip into two pieces, then bridge the gap with wire. The wire gives you flexibility to make a clean 90-degree turn without stressing the strip.
Step 2: Cut the Strip Cleanly
Cut straight across the strip at the marked line using flush cutters or sharp scissors. A ragged cut makes soldering harder, so take a second to get it right. You should see clean copper pads on both cut ends.
In addition, if your strip has a silicone waterproof coating, peel or scrape it back from the pads before you start. Solder won’t stick to silicone. A craft knife works, but go gently so you don’t slice the copper underneath.
Step 3: Tin the Copper Pads
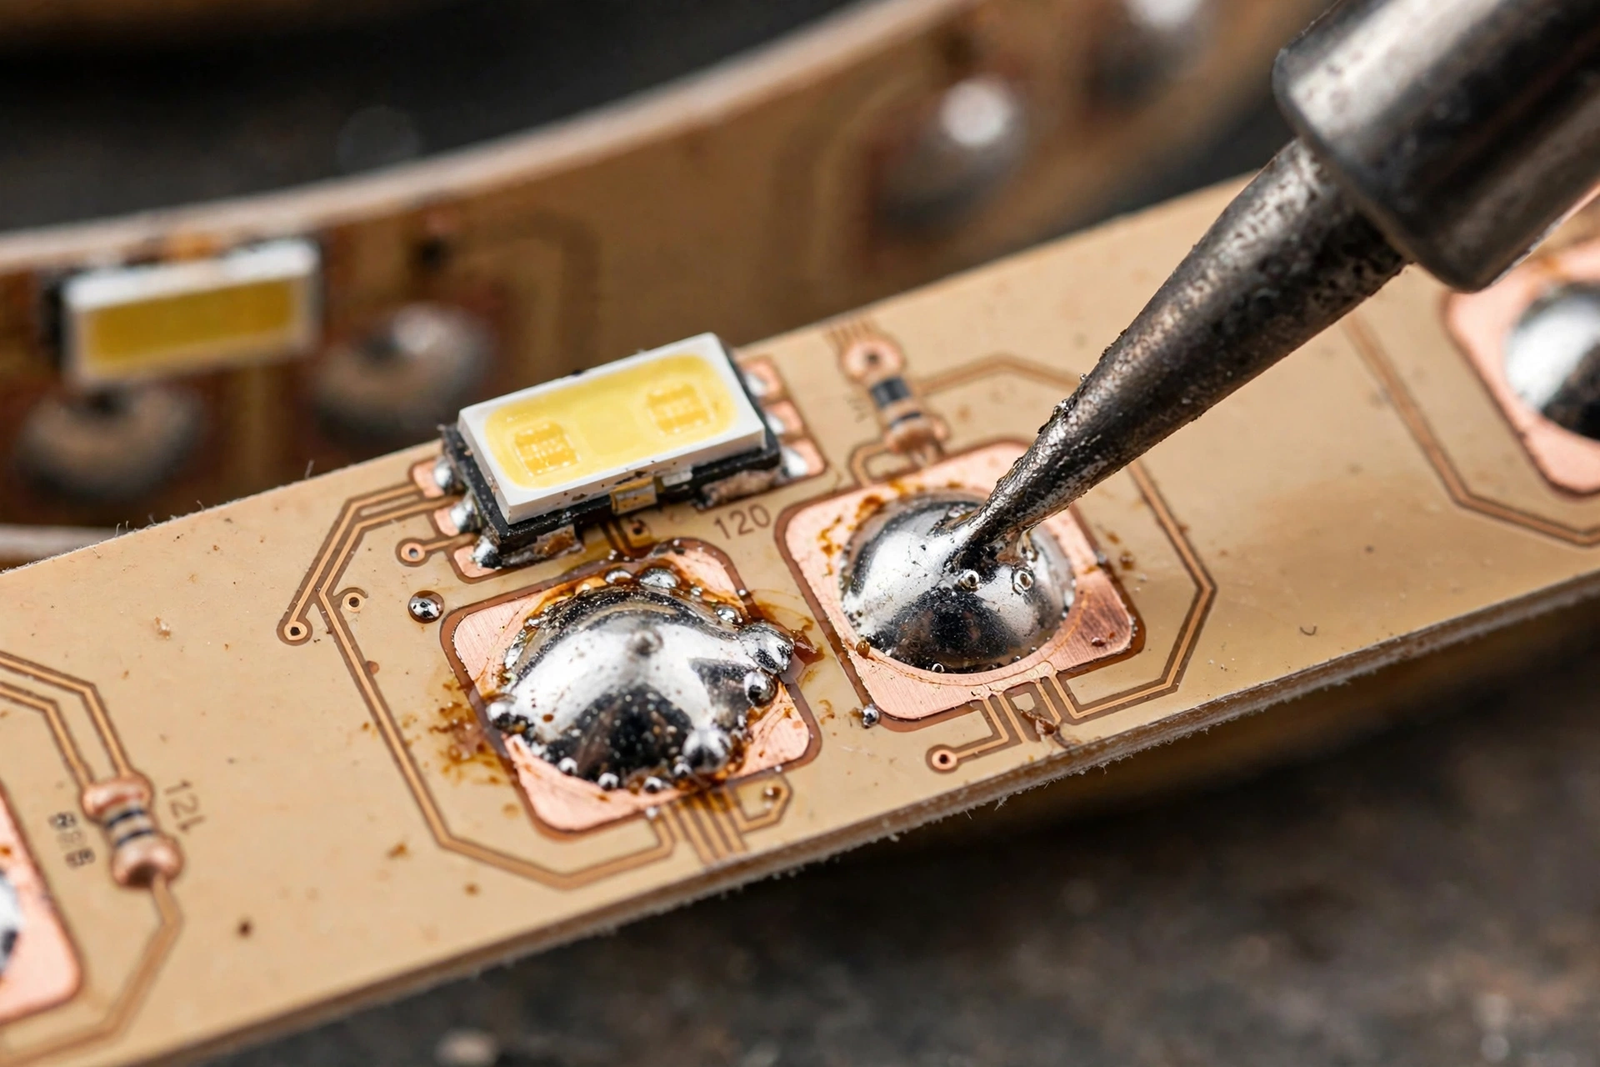
Next, heat your iron and touch a small amount of solder to the tip so it’s shiny and wet. Then press the tip against each copper pad for two to three seconds and feed in a little solder. You want a thin, shiny dome on each pad, not a blob.
Also do this on both pieces of strip, on every pad you’ll connect. For a single-color strip that’s two pads (positive and negative). For RGB that’s four pads. RGBW has five. Tin them all.
Step 4: Prepare Your Wire Jumpers
Meanwhile, cut short pieces of stranded wire, about 2 to 3 inches long for a 90-degree corner. Strip about a quarter inch of insulation from each end, twist the strands tight, and tin the exposed ends with solder.
Specifically, color-coded wire helps a lot. Use red for positive and black for negative on single-color strips. For RGB, match the wire colors to the channel labels if you can: R, G, B, and positive. It saves you from wiring headaches later.
Step 5: Solder the Wires to the First Strip
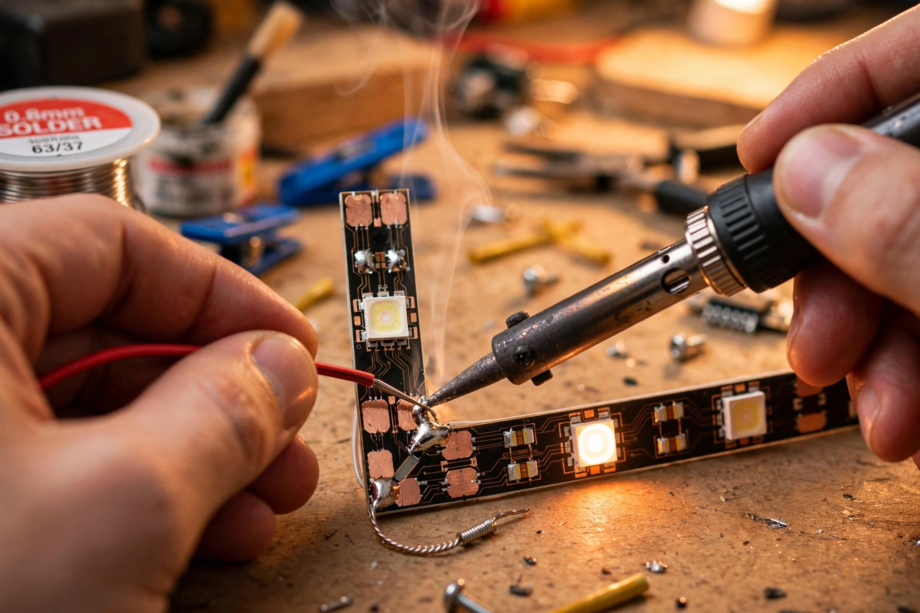
Then hold one tinned wire end against a tinned pad on the first strip piece. Touch the iron to the joint for two seconds. The solder on both sides melts together and you pull the iron away. Hold still for a second while it cools.
Then work through each pad one at a time. Don’t rush. A good joint looks shiny and smooth. A dull, grainy joint is a cold joint and it will fail eventually, so redo it if it looks wrong.
Step 6: Bend the Wires Into the Corner and Solder the Second Strip
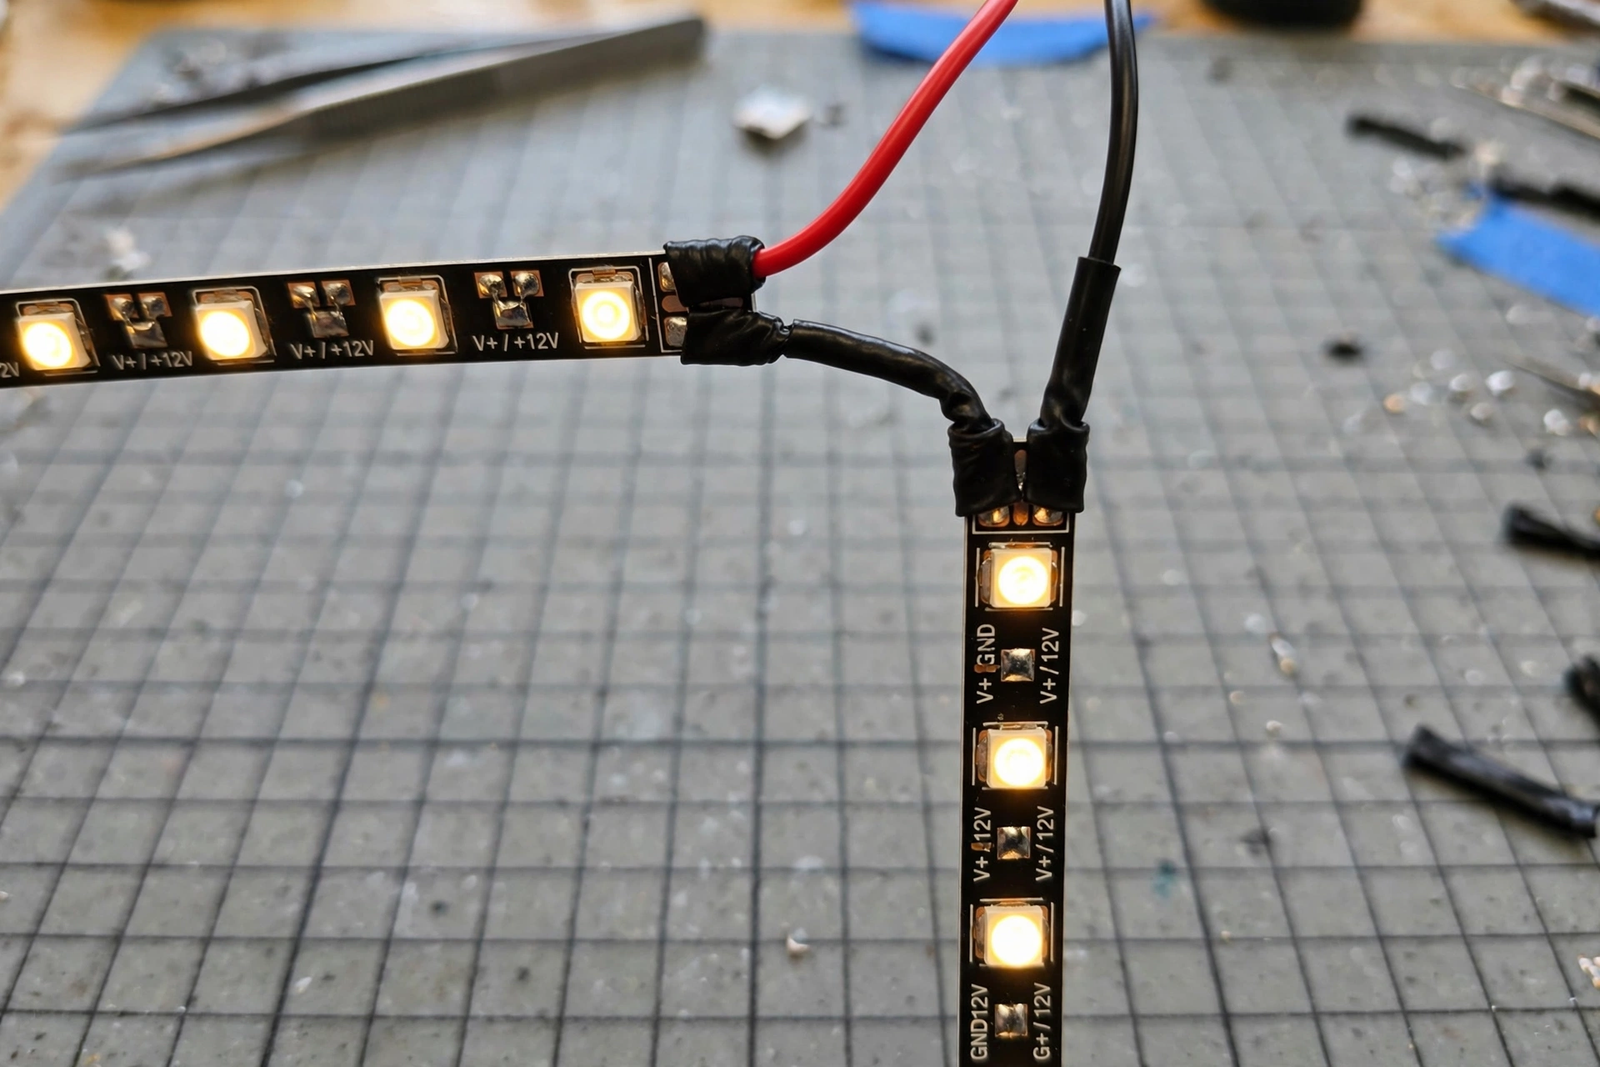
Afterward, bend the wires to form your 90-degree turn. Position the second strip piece where it needs to go and solder each wire to its matching pad. Positive to positive, negative to negative. For RGB, R to R, G to G, B to B, and the common positive to positive.
Therefore, double-check the polarity before you solder the second side. Reversing positive and negative on an RGB strip won’t damage it, but the colors will be wrong and you’ll have to redo the work.
Step 7: Insulate and Test
Finally, slide heat shrink tubing over each joint and shrink it with the side of your iron or a heat gun. If you skipped the tubing, wrap each joint individually with electrical tape. The joints must not touch each other or the aluminum channel.
Subsequently, power up the strip and check the whole run. Every LED should light, colors should be correct, and the corner section should match the brightness of the rest. If a section is dim or off, you have a bad joint. Reheat it and try again.
Common Mistakes That Ruin Soldered Corners
However, the number one mistake is overheating the pads. Hold the iron on the copper for more than five seconds and the pad lifts right off the strip. Then you’re done; that section is ruined. Two to three seconds is the sweet spot.
The second mistake is using too much solder. Big blobs bridge across adjacent pads and short the strip. If you bridge two pads, don’t panic. Heat the blob and wick it away with the iron tip, or use solder wick if you have it.
Here’s a mistake I made on my first corner: I soldered everything, admired my work, then realized I’d wired the RGB channels in the wrong order. Red was green, green was blue. Label your wires before you start, or at least test with a battery before finalizing.
Soldered Corners vs. Clip-On Connectors
So why solder instead of using the cheap L-shaped connectors? It comes down to reliability. Clip connectors rely on tiny metal teeth biting into the copper pads. They work at first, but heat cycles and vibration loosen them over months.
In fact, a soldered joint is a metallurgical bond. It doesn’t loosen. In my experience, a properly soldered corner outlasts the LED strip itself. The trade-off is time and skill. Connectors take thirty seconds. Soldering takes ten minutes and a steady hand.
Table: Soldered Joints vs. Clip-On Connectors
| Feature | Soldered Corner | Clip-On Connector |
|---|---|---|
| Install time | About 10 minutes | About 30 seconds |
| Long-term reliability | Excellent | Fair, loosens over time |
| Profile thickness | Very slim | Bulky, may not fit channels |
| Skill needed | Basic soldering | None |
| Cost | Practically free | A few dollars per corner |
If the corner will be hidden inside an aluminum channel or behind furniture, soldering is the clear winner. For smart strip setups, also verify your bulbs and controllers pair correctly before sealing everything up. The slim profile fits where bulky connectors won’t. If you need something temporary or you’re renting, connectors are fine.
What About Folding the Strip Instead?
For instance, you might have seen the 90-degree fold trick: fold the strip back on itself at 45 degrees to make a turn without cutting. It works in a pinch, but it’s risky. Folding stresses the copper traces, and on dense strips you can crack a trace and kill a section.
Soldering with wire jumpers avoids all of that. The strip itself never bends sharply. The wire takes the turn. It’s the method professional installers use, and once you’ve done it twice, it feels easy.
Tips for Waterproof LED Strips
Waterproof strips add one extra step. The silicone sleeve or coating has to come off the pads before soldering, and it has to go back on after. After your joints are done and tested, seal the area with silicone sealant or slide heat shrink over the whole section.
Thus, don’t skip resealing. An open joint on a waterproof strip defeats the purpose, and moisture will corrode the solder within months. A dab of clear silicone over each joint takes a minute and saves the install.
When Soldering Is Worth It vs. When Connectors Are Fine
Let’s be honest: soldering isn’t always the answer. If you’re putting up temporary party lights for one night, clip connectors are faster and good enough. Similarly, if you’ve never held a soldering iron and the install is in a hard-to-reach spot, connectors save you from a frustrating afternoon.
But for anything permanent, soldering wins. Under-cabinet lighting you’ll use daily? Solder it. A media wall centerpiece? Solder it. Outdoor installs exposed to temperature swings? Definitely solder it. The ten minutes per corner pays for itself the first time you don’t have to troubleshoot a flickering section at midnight.
There’s also a middle path. You can solder the corners that matter most, the ones hidden in channels or behind furniture where a failed connector would be a nightmare to reach, and use connectors for easy-to-access spots. Nobody says it has to be all or nothing.
For broader smart lighting projects, it’s worth checking how your strips fit into your overall setup. Many people pair their LED strips with smart controllers that work with Apple Home or Alexa, and soldered corners make those permanent installs far more reliable. The controller decides the smart features, but a solid physical joint means fewer 2 AM troubleshooting sessions.
FAQs
Can I solder LED strips without flux?
Yes, but it’s harder. Rosin-core solder has flux inside, which is enough for fresh copper pads. If the pads are old or oxidized, extra flux makes a huge difference. A small flux pen costs a few dollars and lasts for dozens of projects. For beginners, I consider it essential rather than optional.
What temperature should my soldering iron be?
Around 350 degrees Celsius (660 Fahrenheit) works well for LED strip pads. Too cool and the solder won’t flow; too hot and you’ll lift the pads off the strip. If your iron has no temperature control, a 30-watt iron with a fine tip is about right. Work quickly, two to three seconds per joint.
Can I solder RGBW or RGBIC strips the same way?
RGBW strips solder the same way, just with five pads instead of four. Addressable RGBIC strips are trickier because they have data lines that are sensitive to timing. You can still solder them, but keep the wire jumpers short, under two inches, to avoid signal issues. Test the effects after soldering.
My solder won’t stick to the pads. What’s wrong?
Usually it’s oxidation or leftover coating. Clean the pads with isopropyl alcohol first. If there’s silicone residue, scrape it off gently with a craft knife. Then add flux and try again. Also check that your iron tip is clean and tinned; a dirty tip transfers heat poorly and nothing sticks.
How do I know which pad is positive?
Look for the plus sign printed on the strip near the cut line. On RGB strips, the common pad is usually marked with a plus or labeled 12V or 24V. If the markings are gone, check the other end of the strip or the manufacturer’s diagram. Getting this wrong won’t damage single-color strips, but test before finalizing anyway.
Can I solder the corner without cutting the strip?
You can fold instead of cutting, but soldering really needs the cut. The whole point is to separate the strip into two pieces and bridge them with wire. If you don’t want to cut, use the fold method or a clip connector. But honestly, cutting and soldering gives the cleanest, most reliable corner.
Is it safe to solder LED strips while they’re powered?
No. Always unplug the power supply before soldering. Soldering on a live strip can short the power supply, damage the LEDs, or give you a nasty burn when a slip bridges the wrong pads. Unplug, solder, insulate, then power up to test. Every time.
Conclusion
Soldering LED strip corners without connectors is a skill that pays for itself the first time a clip connector fails on you. Cut at the marked lines, tin the pads, bridge with short wires, insulate, and test. Ten minutes per corner gets you a joint that lasts as long as the strip.
Next step: practice on a scrap piece of strip before touching your real install. Two practice joints and you’ll have the feel for it.